When Focusrite announced the iTrack Solo, their new iPad audio interface, I was excited. It fit in well with two areas that I’ve been exploring over the past year. The first is my series on iPad Music Creation. The second, and somewhat related theme, is the idea of going portable. Yes, the iPad is extremely portable but maybe not as powerful nor as versatile as a laptop could be. I’m happy to report that the iTrack Solo from Focusrite will work well with both options.
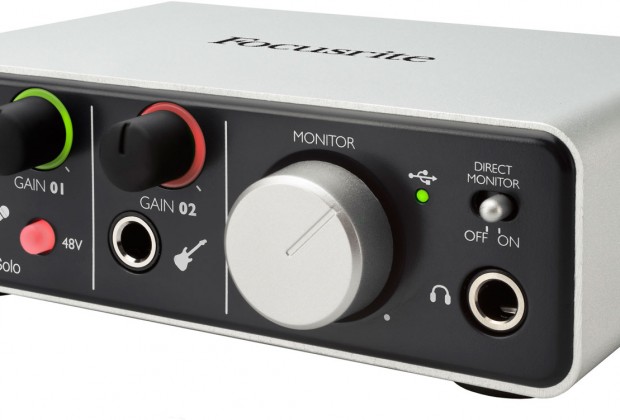
The iTrack Solo’s aluminum unibody chassis seems rugged and has a good, solid feel to it. The front of the unit has a microphone input and an instrument input, each with it’s own gain control. A “gain halo” surrounds each knob and is used as an input level indicator turning red when the signal is too hot and green when you have the correct levels. The preamps used in the iTrack Solo are the same design as used in the Scarlett and Saffire audio interfaces from Focusrite. For outputs, there is a headphone jack on the front and line-outs on the back. This pretty much covers all of your basic I/O needs.
Inside the box you’ll find the actual unit, a USB cable that connects to your computer or an included power supply, and a device cable that connects the iTrack Solo to an iPad via a 30 pin plug. There is also a “Getting Started Guide” along with free downloads of Ableton Live Lite 8 and Focusrite’s Scarlett plug-in suite which include an EQ, Compression, Gate and Reverb. For my review, I used a Shure SM58 microphone and Sennheiser HD 280 Pro headphones.

My first task was to get vocals and guitar into my iPad. Although the iTrack Solo will work with all iPad applications that use the Apple Core Audio driver, I connected the unit to my iPad and launched Garageband. I don’t use Garageband often but had no problems routing signals from the iTrack Solo to the software. The microphone input worked as described and with the ability to use phantom power, your mic options are wide open. When I plugged my guitar into the iTrack Solo, I was able to use Garageband’s built-in amp models to dial in an acceptable sound.
After using the unit on my iPad, I moved the iTrack Solo to my MacBook. Focusrite suggests that you download the most recent drivers before using the unit. Once again, I used Garageband and achieved similar results. Because of the bigger screen size, the availability of a mouse, and additional USB inputs, I felt more comfortable using the unit with my MacBook. Although this has no impact on the iTrack Solo itself, it did make my experience seem more user-friendly.

While the iTrack Solo easily sent and received sounds to both devices, I feel there could be a few improvements on the iPad side. I’m not an engineer so I’m not sure if they are even possible. The first one would be to add a USB/MIDI port to the unit so users could add a keyboard to their rig. It’s a bit cumbersome having to plug and unplug items when you want to switch between vocals and keyboards. The second would be to allow the iTrack Solo to charge your iPad while it is plugged in since the unit has to have some sort of power supply.
The bottom line is that the iTrack Solo is a great start. If you’re looking for a high-quality I/O for your iPad, look no further. I see myself using the unit more with my laptop than the iPad mainly because it gives me more options and less cables. This is more of a limitation on the iPad and not the iTrack Solo. With my laptop, I can have a decent I/O, use a USB midi keyboard, and record with almost any DAW to create music anywhere. Now that’s portable!
For more information, please visit www.focusrite.com


Pingback: Hands On with the Focusrite Scarlett 2i4 Audio Interface at AES 2012 in San Francisco - The Noise Room - Ideas and Information for Independent Musicians
How do you connect this with your macbook? i Have a macbook pro…
When I tested the unit, it had a USB adapter that I plugged into my MacBook. Hope that helps.